

Metro tiles are the most layout-dependent tile in any bathroom. The same 75 mm × 150 mm tile laid horizontally, vertically, or in a herringbone pattern produces three completely different spatial results. In a small bathroom, that distinction is not decorative – it is structural. This guide covers every practical layout option for metro tiles in compact UK bathrooms, with specific guidance on orientation, grout, and colour combinations that genuinely work.
Why Metro Tiles Work Particularly Well in Small Bathrooms
Metro tiles are small, proportionate, and directionally flexible – three qualities that make them exceptionally well-suited to compact bathroom layouts.
Their size means cuts at edges are small and inexpensive. Their rectangular format creates strong directional lines that can be used deliberately to change how a room reads spatially. A 75 mm × 150 mm tile offers more layout versatility per square metre than almost any other format.
The original London Underground application – from which the name derives – was chosen specifically for its ability to cover irregular tunnel surfaces efficiently. That same adaptability translates directly to the awkward corners, sloped ceilings, and tight dimensions of small UK bathrooms.
Metro Tile Sizes: Which Format Suits a Small Bathroom?
Smaller metro formats (75 mm × 150 mm) suit cloakrooms and compact en suites; larger subway formats (100 mm × 300 mm) work better in standard small bathrooms of 3–5 m².
The proportional relationship between tile size and room size matters. A very small tile in a very small room creates a repetitive grid that makes the space feel busier. Scaling up slightly – even to 100 mm × 200 mm – reduces that grid density and improves the result.
Metro and Subway Format Reference
- 75 mm × 150 mm — the classic metro format; high grid density; suits feature walls and cloakrooms
- 100 mm × 200 mm — a mid-scale option; more flexibility on orientation; popular in UK en suites
- 100 mm × 300 mm — the modern subway format; fewer grout lines; suits bathrooms of 3 m²+
- 50 mm × 200 mm — a slim elongated format; strong directional effect; best used vertically for height
- 150 mm × 300 mm — the large subway; minimal grid; best in bathrooms approaching standard size
The 6 Best Metro Tile Layouts for Small Bathrooms
1. Vertical Stack Bond
Vertical stack bond lays tiles in straight columns, drawing the eye upward and making low-ceilinged small bathrooms feel significantly taller.
This is the single most effective layout for adding perceived height in a compact bathroom. The clean vertical lines carry the eye from floor to ceiling without interruption.
- Best tile for this layout: 50 mm × 200 mm or 75 mm × 150 mm slim formats
- Grout line width: 2–3 mm; keep consistent for the vertical effect to read clearly
- Colour: white or pale grey tiles with a matching grout maximise the height illusion
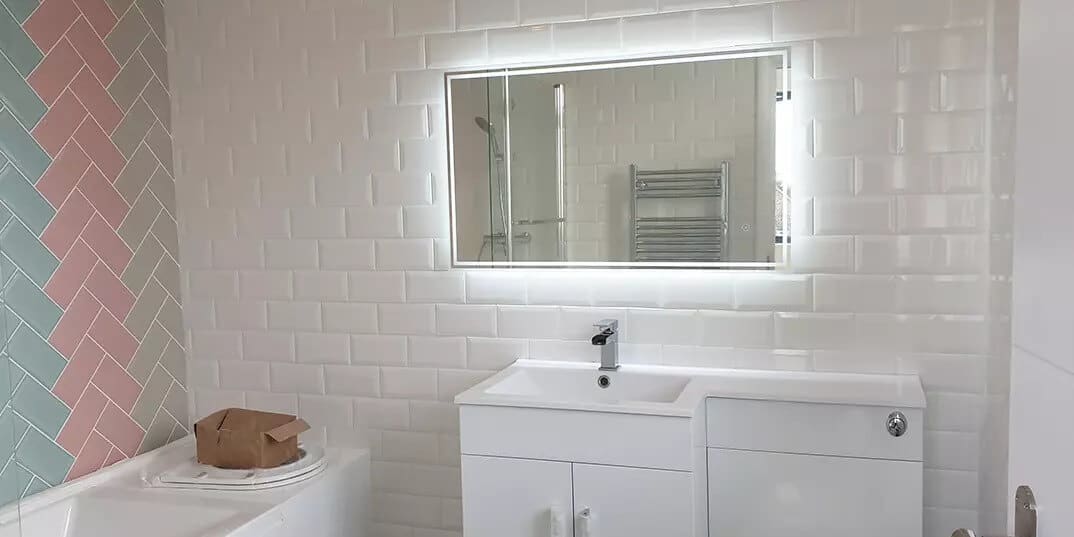
2. Horizontal Brick Bond (Traditional Offset)
The classic 50% offset brick bond laid horizontally is the most widely recognised metro pattern – it adds width and suits bathrooms with adequate ceiling height.
This is the standard default layout. It works well but does not offer the spatial manipulation of other orientations. In a small bathroom with a normal 2.4 m ceiling, it is a safe and reliable choice.
- Offset: 50% is traditional; a 1/3 offset reduces the repetitive staggered effect on long walls
- Best grout: white on white for minimal grid; dark grout for deliberate graphic contrast
- Avoid: using this layout on a very low ceiling – the horizontal emphasis makes low ceilings feel lower
3. Vertical Brick Bond (Offset Columns)
Vertical brick bond with a 50% offset combines the height benefit of vertical lines with the visual movement of the offset – a stronger effect than either alone.
The offset between columns creates a subtle rhythm that prevents the vertical layout from looking rigid. It is less commonly seen than horizontal brick bond, which makes it a considered choice in a small bathroom.
- Works particularly well on floor-to-ceiling shower enclosures
- Use a slim tile format (75 mm × 150 mm or 50 mm × 200 mm) for maximum vertical impact
- Combine with plain tiles on adjacent walls to prevent visual competition
4. Herringbone
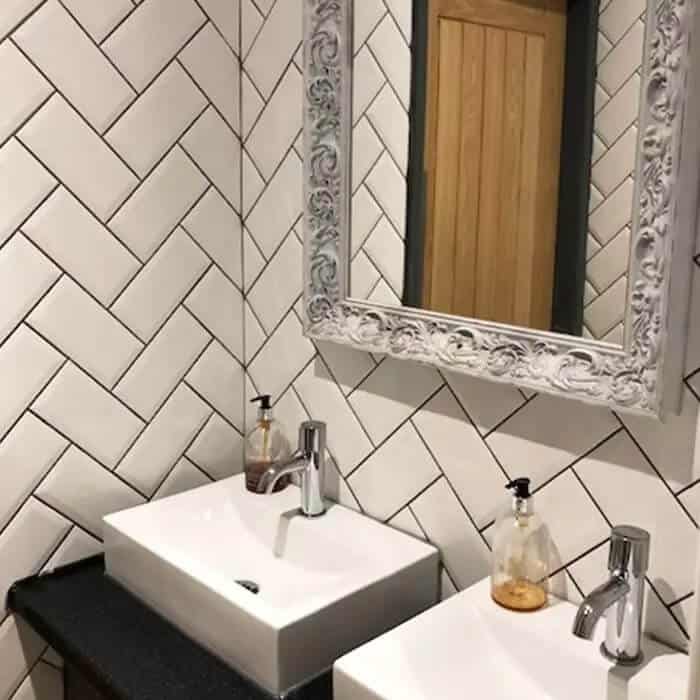
Herringbone metro tiles create diagonal movement across a surface, making small bathrooms feel more dynamic without introducing additional colour or pattern.
The 45-degree angle breaks the predictability of standard layouts. In a small bathroom, this adds visual interest without increasing the number of tile types or colours in the space.
- Best application: single feature wall; full-room herringbone in a small space overwhelms quickly
- Tile format: 75 mm × 150 mm or 100 mm × 200 mm; longer tiles create a more pronounced chevron effect
- Waste allowance: add 15–20% for herringbone; the diagonal cuts increase material loss significantly
- Grout: use a contrasting grout to make the pattern legible; matching grout softens it considerably
5. Vertical Herringbone (Chevron Direction Upward)
Vertical herringbone with the point of the chevron facing upward creates a strong upward visual pull – the most dramatic height-adding layout available with metro tiles.
Where standard herringbone creates lateral movement, vertical herringbone directs the eye toward the ceiling. In a bathroom with a 2.1 m or 2.2 m ceiling, this layout adds more perceived height than any other tile orientation.
- Most effective on the wall directly facing the bathroom door – maximum visual impact on entry
- Keep all other surfaces in plain tiles; vertical herringbone as a full-room scheme is too active in small spaces
- Budget note: labour costs are higher for herringbone; factor this into the total project cost
6. Stacked Horizontal (Grid Bond)
Stacked horizontal grid bond aligns all tiles in a straight grid – it is the most contemporary metro layout and pairs well with minimal, clean bathroom aesthetics.
Unlike the traditional brick bond offset, grid bond creates a precise, architectural quality. It reads as deliberate and modern rather than traditional.
- Best with: rectified metro tiles where dimensional consistency is guaranteed
- Grout line width: 1.5–2 mm maximum; wider joints break the minimal effect
- Colour combinations: works best with a single-colour scheme – white tiles, white grout, white sanitaryware
Grout Colour: The Variable That Changes Everything
Grout colour on metro tiles determines whether the layout reads as graphic and defined or soft and continuous – both are valid but produce entirely different results.
This decision matters more with metro tiles than with almost any other format. The high grout-line density of a small tile means grout covers a significant proportion of the total wall surface.
Grout Colour Guide for Metro Tiles
- White grout on white tiles: continuous surface; minimises the grid; best for small bathrooms where spatial calm is the goal
- Grey grout on white tiles: the most popular UK combination; adds definition without high contrast; suits both traditional and contemporary schemes
- Black grout on white tiles: bold, graphic, high-contrast; strong design statement; works best as a feature wall rather than a full-room application
- Coloured grout (blush, sage, terracotta): an increasingly popular choice; adds a secondary colour layer without changing the tile itself
- Matching grout on coloured tiles: always match grout to tile when using coloured metro tiles; contrasting grout on a coloured tile looks unintentional
Colour Combinations That Work in Small Spaces
Pale, cool-toned metro tiles with close-matched grout consistently outperform bold colour combinations in small bathrooms by maximising light reflection and perceived space.
That said, a fully white small bathroom is not the only option. Colour can work in compact spaces when it is handled with the same spatial logic as layout and grout.
Tested Colour Combinations for Small Bathrooms
- White tile, white grout: maximum spatial effect; requires consistent cleaning in hard-water areas
- Pale grey tile, light grey grout: contemporary and forgiving to maintain; suits north-facing bathrooms
- Sage green tile, warm grey grout: popular in 2025–2026; feels calm and organic without dark
- Blush tile, cream grout: warm and feminine; works in compact en suites and cloakrooms
- Cobalt blue tile, white grout: high-impact feature wall; use sparingly – one wall maximum in a small space
- Charcoal tile, dark grout: works in a cloakroom with strong lighting; full-room charcoal metro in a small bathroom needs careful lighting design
Practical Installation Tips for Small Bathroom Metro Layouts
Planning the tile layout on paper before installation prevents awkward cuts at corners and ensures the chosen orientation reads correctly on every wall.
Small bathrooms have more corners, reveals, and interruptions per square metre than larger rooms. Each one requires a cut. The layout needs to be planned to manage those cuts deliberately – not left to chance during installation.
- Set out from the centre: find the mid-point of each wall and work outward; this ensures even cuts at both edges rather than one full tile and one sliver
- Plan around the most visible surface first: the wall facing the door sets the visual tone; prioritise clean cuts and consistent layout here
- Account for fixtures: plan tile rows relative to basin height, bath rim, and shower threshold; a tile joint running directly across a fitting looks unplanned
- Use a spirit level at every course: small tiles compound any deviation across multiple rows; a 2 mm drift per course becomes 20 mm over ten courses
- Seal before grouting: apply a grout-release agent to textured or crackle-glaze metro tiles before grouting; grout staining in the tile surface is difficult to remove afterwards
Summary
Metro tiles are a layout problem before they are a style decision. Vertical orientations add height; horizontal layouts add width; herringbone adds movement. In small bathrooms, choose the orientation that addresses the room’s specific spatial weakness first – then consider colour and grout. Scale tile size to room size, plan cuts before installation begins, and match grout to the spatial outcome you need. The tile itself is the easiest part of the decision.